SAML with PingIdentity
Based on your application type, refer to the appropriate section for SAML with PingIdentity configuration:
Once SAML configuration is ready, you can add user groups to erwin Mart Portal.
Before you configure SAML with PingIdentity, ensure that you have responded to the questionnaire from your Quest Support representative so that they can provide you with the Identifier (Entity ID) and Reply URL (ACS URL) for your erwin Mart Portal instance. If you did not receive the questionnaire, reach out to your Quest Support representative.
To configure SAML with PingIdentity for erwin Mart Portal on-cloud authentication, follow these steps:
-
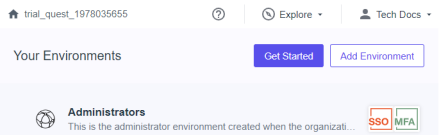
Log in to PingIdentity Console.
-
Click Administrators to set up your environment.

-
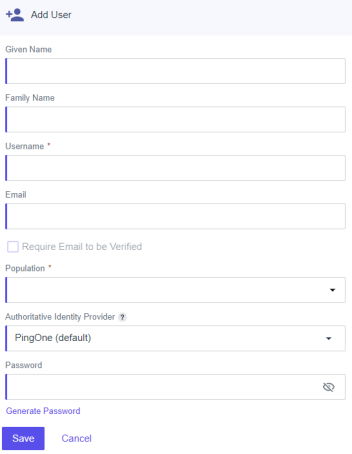
Click Directory > Users >
 .
.
-
Enter user's information and click Save.
-
Click Directory > Groups >
.
-
Enter Group Name and select Population.
-
Click Save.

-
Click
 . Then, click Add/Remove Users.
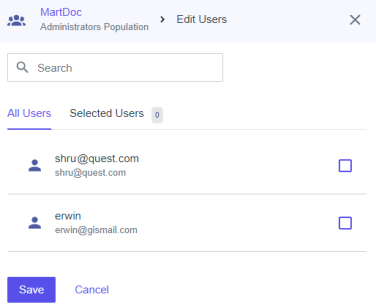
-
Select the users that you want to add to your group and click Save.
-
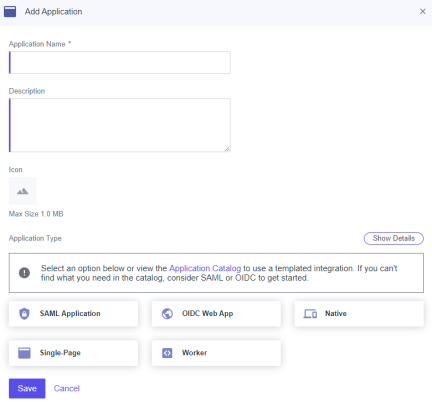
Click Applications > Applications >
.
-
Enter an Application Name.
-
Click SAML Application and click Save.
-
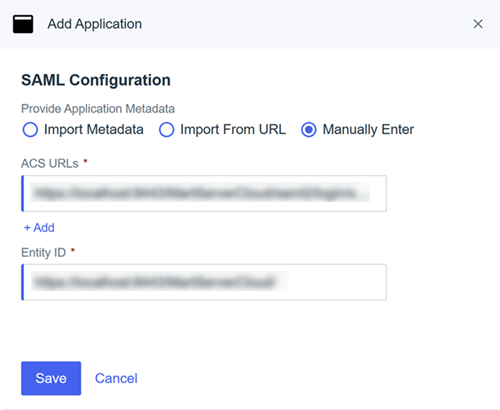
Click Manually Enter and enter the Entity ID and ACS URL provided by the Quest Support team.
-
Click Save.
-
Click
 against your application name to enable user access to your application.
 -
In the list of applications, click your application name.
-
Click Attribute Mappings >
 > Add.
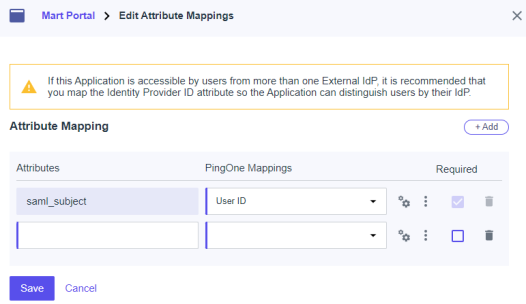
-
Add another attribute and map as shown in the following image.

Similarly, you can add a display name here.
-
Click Save.
These attributes are to be shared with the Quest Support team for configuration. -
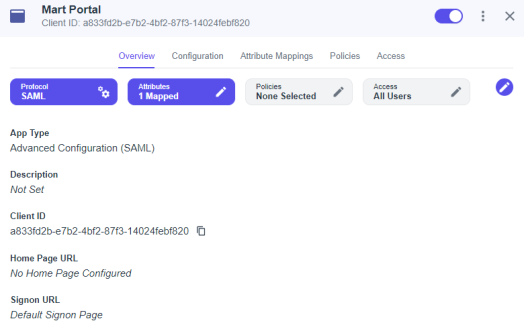
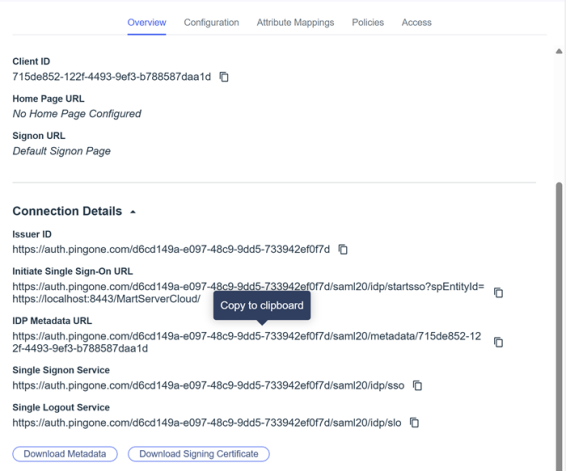
From the Overview tab, copy IDP Metadata URL.
-
Share the following details with the Quest Support team:
- Metadata XML URL: The IDP Metadata URL copied in step 20.
- Group Attribute Name: The value configured in step 18.
- User Email Attribute Name: The value configured in step 18.
- User Display Name Attribute Name: The value configured in step 18.
Once the support team authenticates for you, you can move to adding groups in at https://<your_instance>.myerwin.com/MartPortal.
To configure SAML with PingIdentity for erwin Mart Portal on-premises authentication, follow these steps:
-
Log in to PingIdentity Console.
-
Click Administrators to set up your environment.
-
Click Directory > Users >
.
-
Enter user's information and click Save.
-
Click Directory > Groups >
.
-
Enter Group Name and select Population.
-
Click Save.
-
Click
. Then, click Add/Remove Users.
-
Select the users that you want to add to your group and click Save.
-
Click Applications > Applications >
.
-
Enter an Application Name.
-
Click SAML Application and click Save.
-
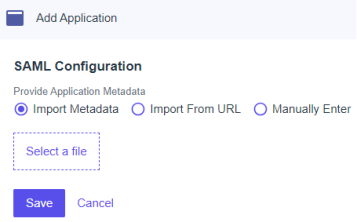
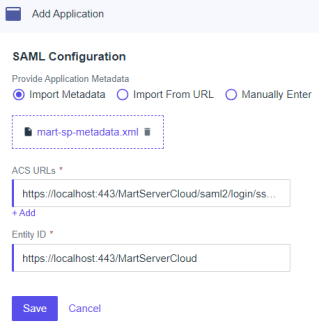
Click Import Metadata and select the file that you downloaded (erwin Mart Portal Configuration > Authentication tab > Download SP Metadata) during erwin Mart Portal configuration.
-
Click Save.
-
Click
against your application name to enable user access to your application. -
In the list of applications, click your application name.
-
Click Attribute Mappings >
> Add.
-
Add another attribute and map as shown in the following image.
Similarly, you can add a display name here.
-
Click Save.
These attributes will be used on the erwin Mart Portal Configuration screen. -
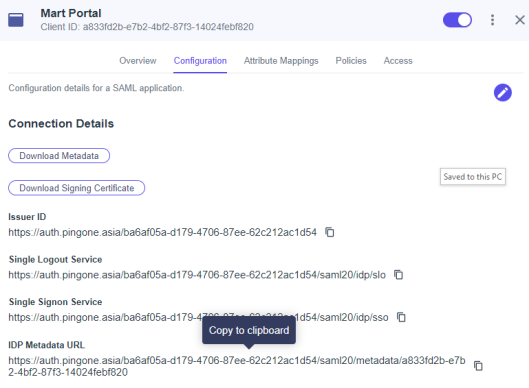
From the Overview tab, copy IDP Metadata URL.
-
On the erwin Mart Portal Configuration screen, click the Authentication tab, and then and follow these steps:
-
In the Metadata XML field, paste the copied SAML Metadata URL copied in step 20.
-
In the Group Attribute Name, User Email Attribute Name, and User Display Name Attribute Name fields, enter the values that are configured in step 18.
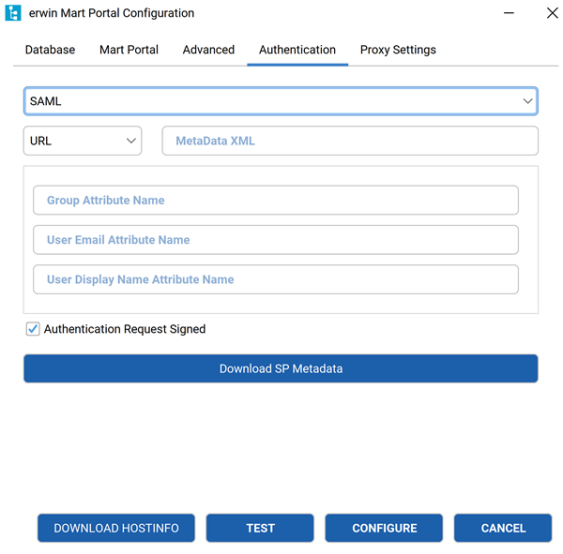
The User Email Attribute Name and User Display Name Attribute Name fields are optional.
-
-
Click Configure.
Your erwin Mart Portal is now authenticated via PingIdentity.
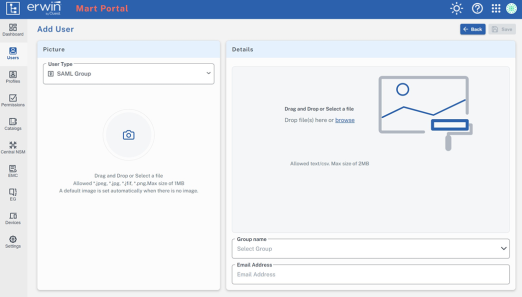
Adding Groups in erwin Mart Portal
To add your PingIdentity SAML groups to erwin Mart Portal, follow these steps:
-
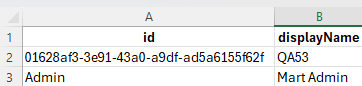
Create a CSV file containing the <group_attribute_value> and <group_display_name>.
You can also use the sample template for groups and replace the sample values with the actual Group Attribute Name and Group Display Name.

-
Log in to the erwin Mart Portal as an administrator.
-
Go to Application Menu > Users.
The Users page appears.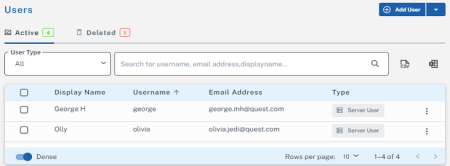
-
Click Add User.
The Add User page appears.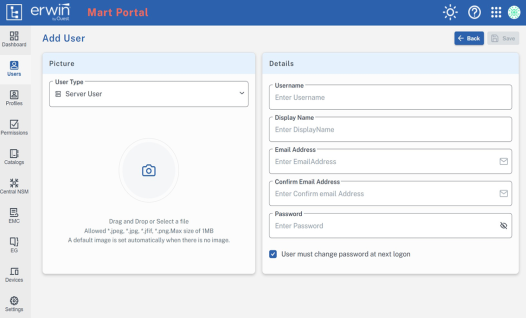
-
Under User Type, select SAML Group
-
Drag and drop the CSV file that you created in step 1.
-
Under Group name, select the required group.
-
In the Email Address field, enter your email address.
-
Click Save.
The group has been added.